Invoice Rules
Tokeet’s new auto invoicing allows you to automatically create, send, mark as paid and even charge invoices. This article will cover the steps required to create an invoice rule, which determines when to send an invoice and which invoice template to use when doing so. If you have not yet created an Invoice Template, please refer to the following article for a step by step on how to do so: Invoice Templates
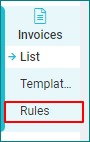
Navigate to Invoice Rules
Click on invoices to open the invoices sub-menu and select Rules.
Select Add Invoice Rule to create a new invoice rule.
Creating a New Invoice Rule
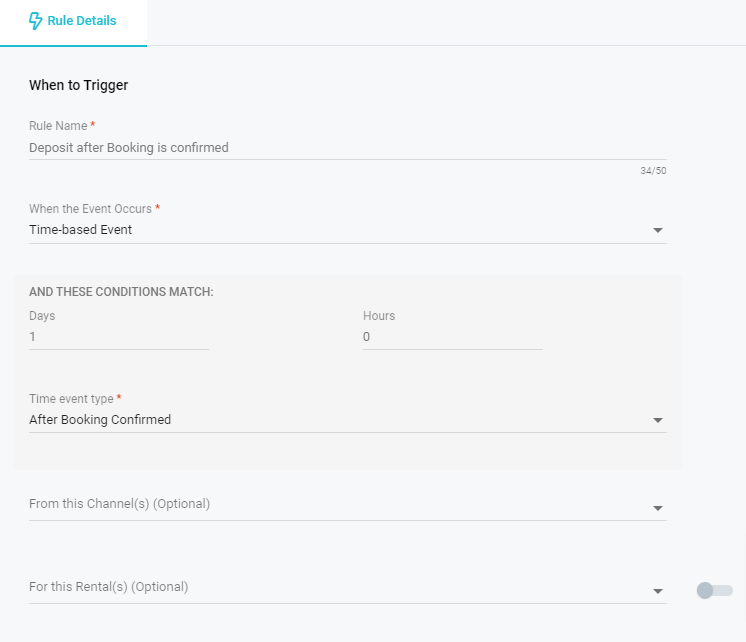
Apply your trigger conditions
On the first tab of the Invoice Rule overlay, you will be presented with options to control the conditions and rules for when to send an invoice to a guest automatically. Start by choosing the conditions under "When to Trigger"
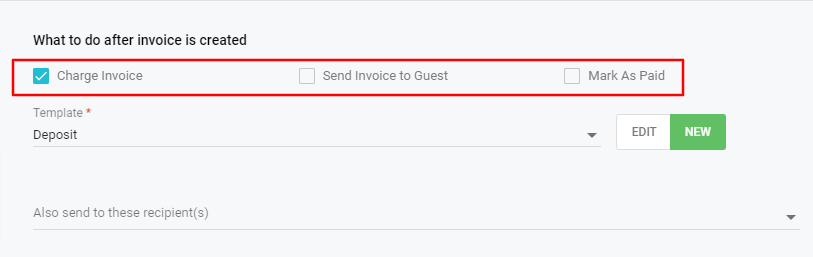
Specify the action(s) to be taken when the trigger fires
Now that you've set when the trigger should fire it's time to decide what you would like to do when those conditions are met.
In the example below, we have decided to charge the card when the conditions are met. Please note that you can choose any combination of the options seen below. If no options are selected an invoice will be created but no additional actions are taken.
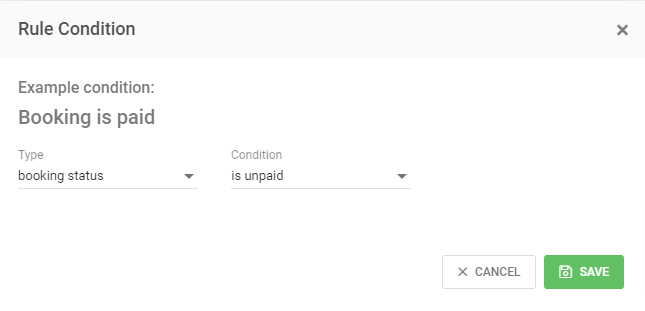
Specify additional conditions
Just like Automata, you can further restrict when a trigger is fired under Rule Conditions.
Start by clicking +New to create a new condition.

In the example below, we have set a condition to only charge the invoice if the booking status is unpaid. This means that this rule will not fire for bookings that have already been paid (e.g on Airbnb).
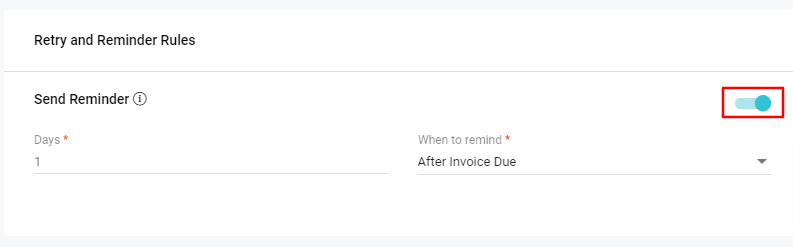
Specify Retry and Reminder Rules
You can also choose to remind your guests when an invoice is past due by scrolling down to that section.
In the example below, we have set an invoice reminder to occur 1 day after the invoice due date.
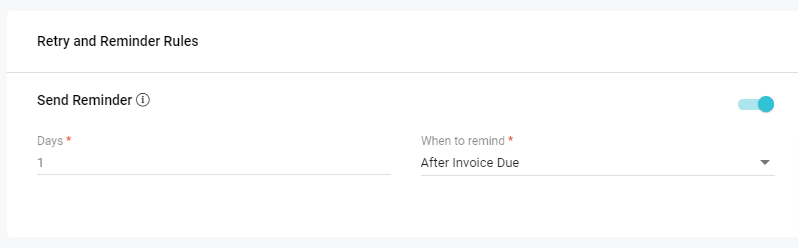
To toggle the reminder on or off, use the blue toggle option.
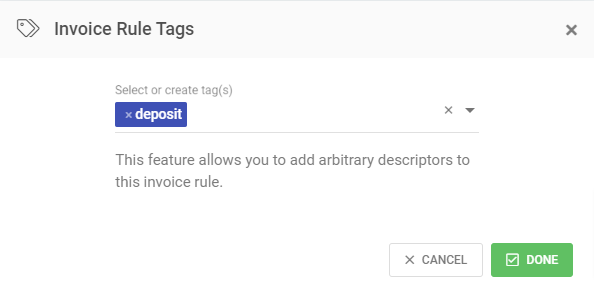
You can now go ahead and save the invoice rule or even add tags to it.
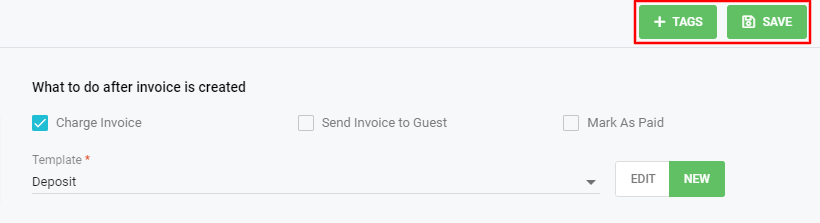
Tags will allow you to group invoice rules and easily filter by that value
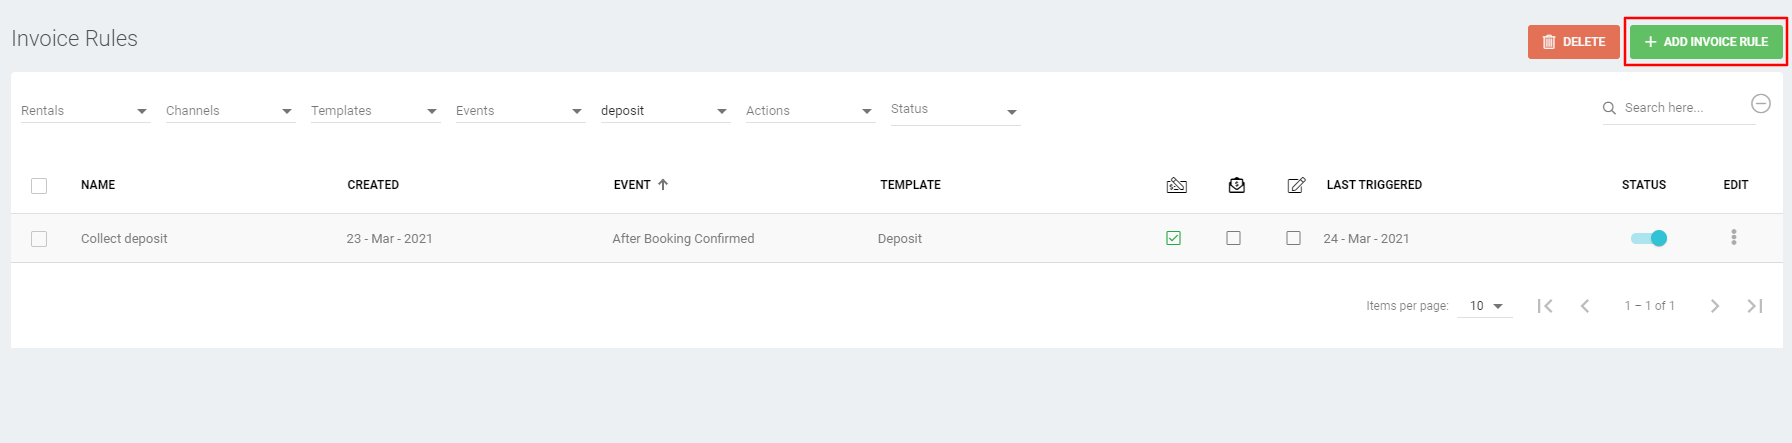
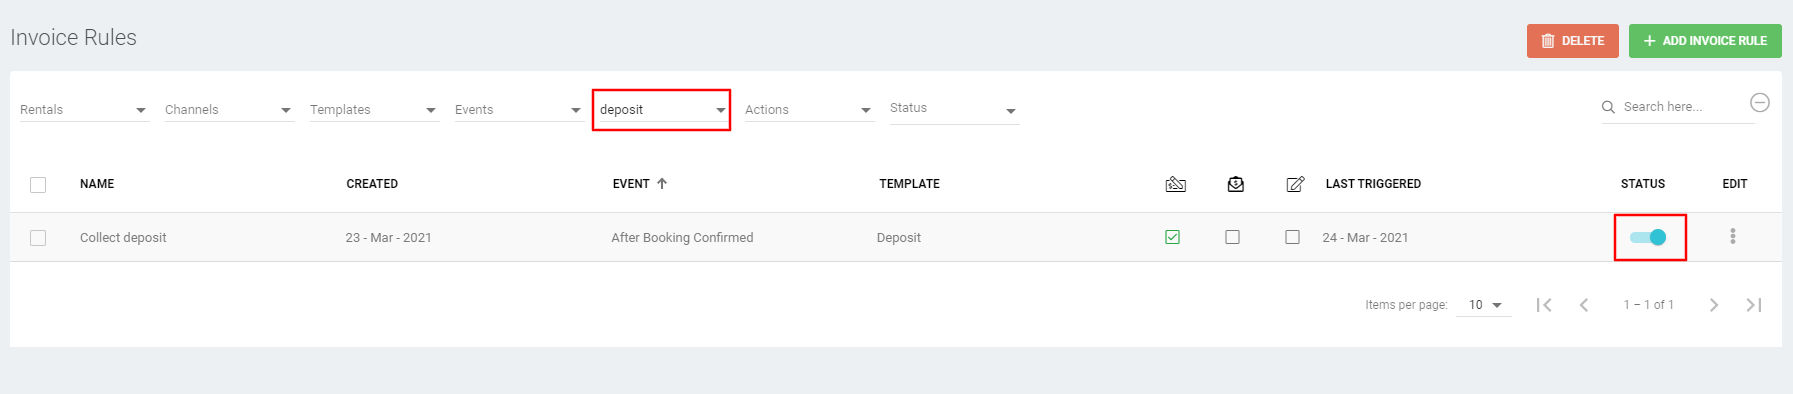
After saving, your invoice rule will appear in a list. Here you will see that we have filtered the list using the "Deposit" tag. If you wish to disable a rule, you can use the blue status toggle.
And that's all there is to set up your invoice rules!