Tokeet Version 3 Triggers
Starting in June of 2019, the Tokeet Automations section will be undergoing some changes that you should be aware of. Ever since the introduction of Automata as a Tokeet Add-On we have sent email communications to our users discussing the migration of Tokeet triggers exclusively to Automata. After receiving input from many of our users we believed that leaving some automation functionality in place was the best course of action. Here is what you can expect.
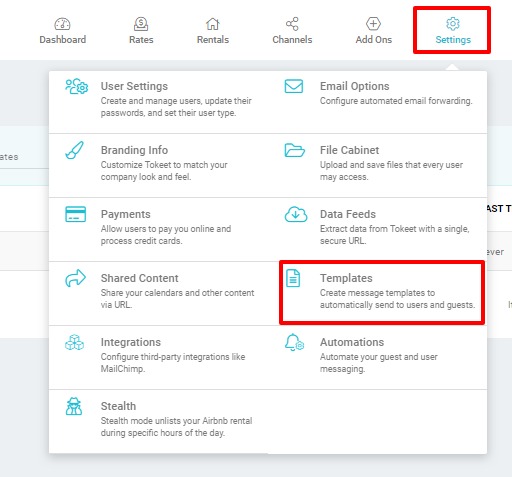
Tokeet Templates
Templates created for triggers in the old version of Tokeet will still be accessible in Tokeet Version 3. You will not need to remake your templates in Version 3.
- To create new Templates in Tokeet Version 3 select Templates in the Settings Menu.
- Select Add on the top right to open the Edit Template overlay. Then choose the template type using the drop-down menu shown below.
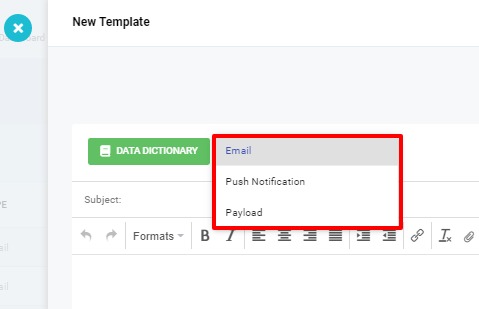
- Edit the message subject, body and utilize the Data Dictionary to add inquiry, guest or rental specific information to the message automatically.

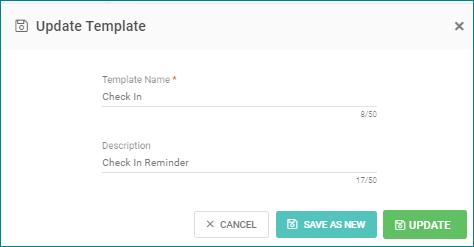
- Once you're done editing the message, click Save to give your template a name and description.
TV3 Automations
The new Tokeet automations module provides some new improvements as well as some new limitations. The major difference between what was available in TV2 and what will be available in TV3 has to do with the number of triggers that can be created for each event type.
- The TV3 Automations module is located under Settings.

- Each event type in Tokeet Version 3 will allow you to create 1 trigger which you can set to go out to guests, Tokeet users or both. After creating a trigger for an event type, it will no longer show as an option when creating a new trigger.
In the example below, a Booking Confirmed trigger has already been created. It is not provided as an option for this new trigger. You will need to edit the existing trigger or delete it to create a new Booking Confirmed trigger.

- Triggers created in Tokeet Version 2 will need to be re-created in Tokeet Version 3. This is due to the changes mentioned above. When logging into TV3 you will not see any of your existing triggers in the Automations section. This does not mean that your triggers will stop firing when required. We expect all trigger functionality to continue working as you are used to until Tokeet Version 2 is retired on June 1st 2019.
- Time Based triggers are no longer optional in Tokeet Version 3. Time based triggers will be used exclusively in our Add-On product Automata.
- The Trigger user interface has undergone an upgrade. Using our Add-On product Automata as a model, we have provided a more convenient way to update and edit your triggers and templates. Clicking into any created trigger in TV3 will provide you with the Trigger Details overlay. The first tab is the Overview tab, where you can configure the trigger's specifications and Save your changes.
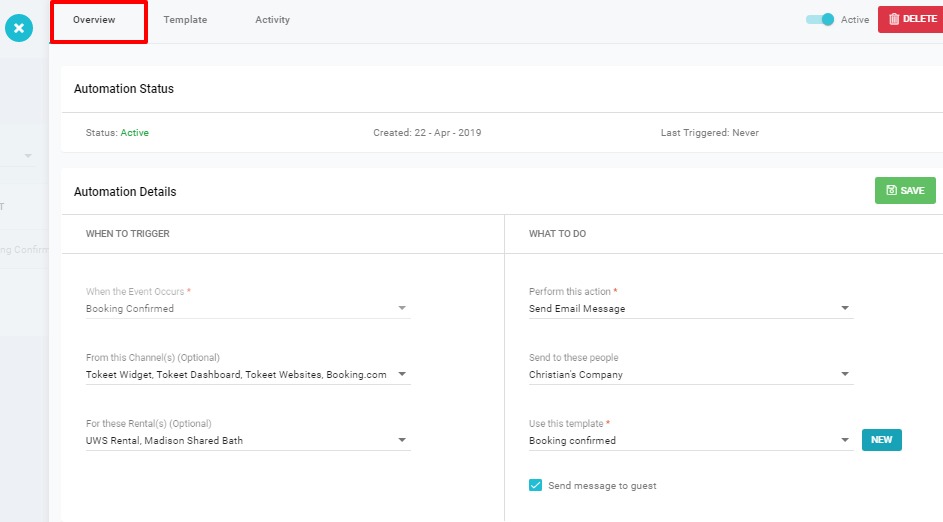
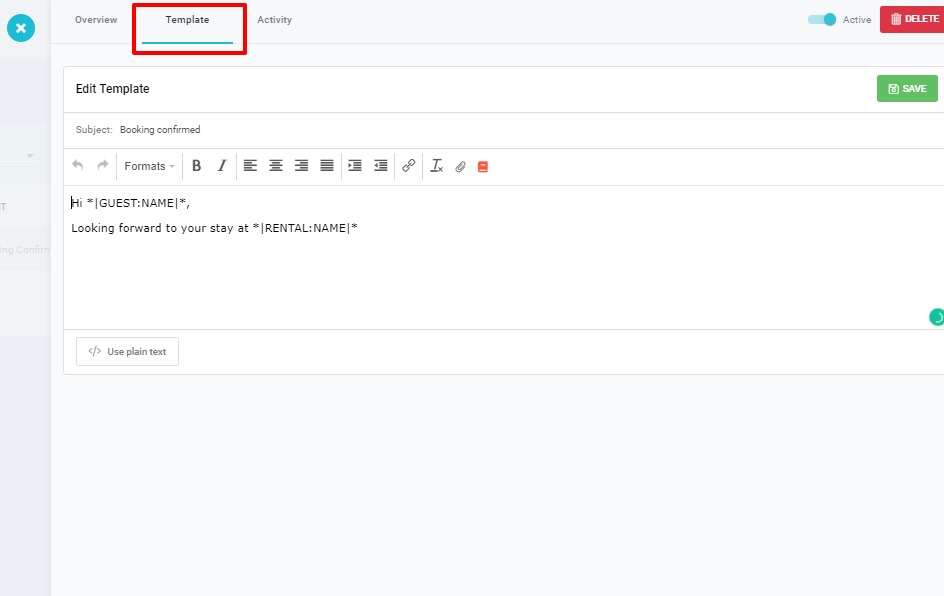
- The Template tab allows you to view and even edit the template without having to navigate to the Templates module to do so.
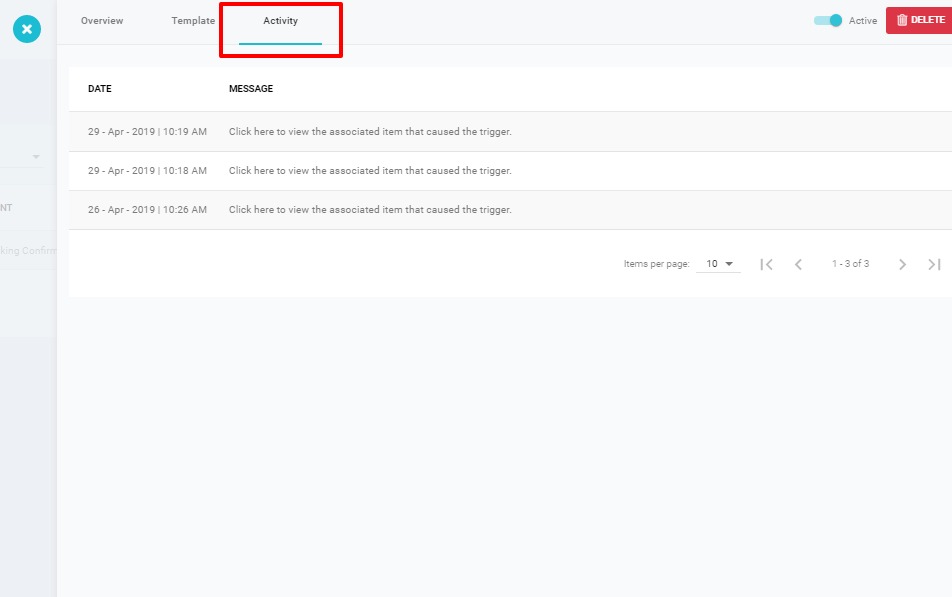
- The Activity Tab allows you to see whether a trigger has fired when expected, and pull up the Inquiry Details overlay for any of the logged trigger events in the list.
Custom Codes
Making templates that work universally for all of your rental and channel combinations will be key to getting the most out of the TV3 automations module. Since the limitation of creating one trigger per event type was introduced, making a template serve many purposes is more important than ever.
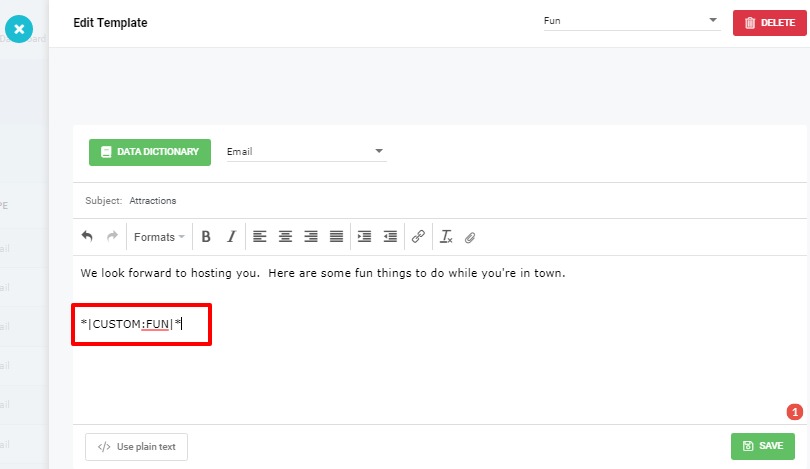
To help you create templates that serve every situation we introduce Custom Codes to TV3. Custom Codes allow you to create your own Data Dictionary items so that you can have 1 trigger serve more needs.
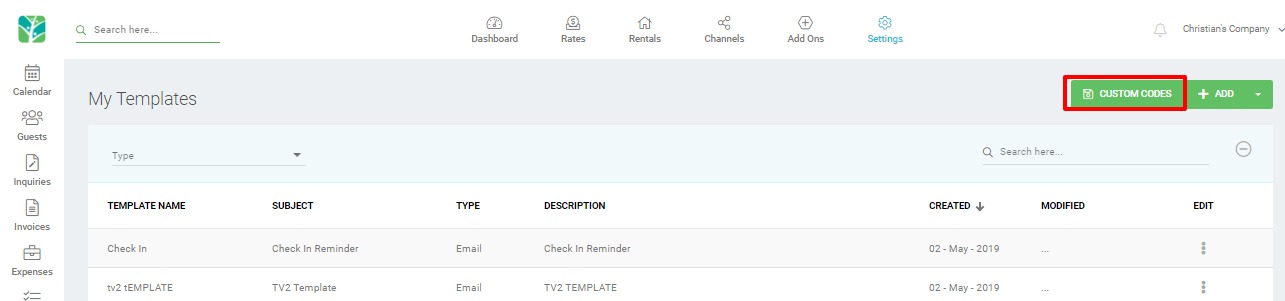
- Custom Codes are found in your Templates module. Click on Settings, and Templates to find the Custom Codes button on the top right.
- In the example below we have created 2 codes which are both called FUN. They each contain separate sets of information. Local attractions for Nashville will show up when the booking that triggers the automation is in one of the selected rentals, while local attractions for New York will appear when the booking is on one of the selected New York rentals.
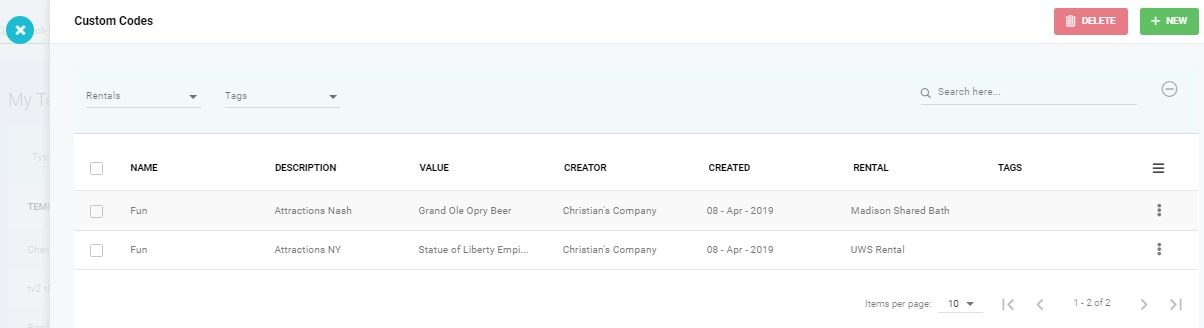
- Now, creating a template with the Data Dictionary "FUN" will mean that the correct list of local attractions shows up depending on the rental associated with the booking.
Thank you for taking the time to familiarize yourself with the changing feature set. We look forward to future improvements to our user experience and are glad you have decided to join us! As always, please don't hesitate to ask any questions not covered in this article using the live chat support option.